

Isolate connected accounts, action permissions, CLI sessions, and MCP tools inside your organization.
The word “workspace” also names the billing and membership tenant in this product — the organization Receipt creates at signup is literally called
<Your Name>'s Workspace. The two are different things, and Organizations and workspaces tells them apart. Everything on this page is about the second one: the authorization boundary.Two ways in
The same workspace table appears in two places, and they are not equivalent.
In the sidebar, the MCP Gateway area lists only Workspaces while you are at gateway level, and both that entry and the area heading itself lead to Organization settings → Workspaces. The landing page has no sidebar entry of its own, so the second table is the one you meet by clicking. Once you open a workspace the area lists only All workspaces. Clicking any row in either table opens that workspace’s Overview, which is where the setup panel and the tabs live.
The workspace table
Columns are#, Workspace, Sharing and tools, Updated and Actions. Rows are sorted Default first, then alphabetically, ten to a page by default, with a Search workspaces box on the settings page. A small dot beside a name marks the workspace you currently have selected (its accessible name is Active workspace).
Sharing and tools is one column holding two independent facts, each shown only when it is true:
- A group icon, labelled
<name> is shared, once the workspace has any member other than you or a pending invitation. An invitation counts from the moment it is sent, so the row reads as shared while the recipient is still deciding. - A wrench, labelled
<name> has tools enabled, when the workspace has at least one connection. Despite the label, the test is connection presence, not the per-connection allowlist — that lives with the connection itself, and reading it would cost a request per row. Tools and permissions is where you see what is actually published.
No workspaces yet., or No workspace matches this search. when a search is filtering it. The MCP Gateway landing page prints No workspaces yet. Create one to get started. in place of the table.
Create a workspace
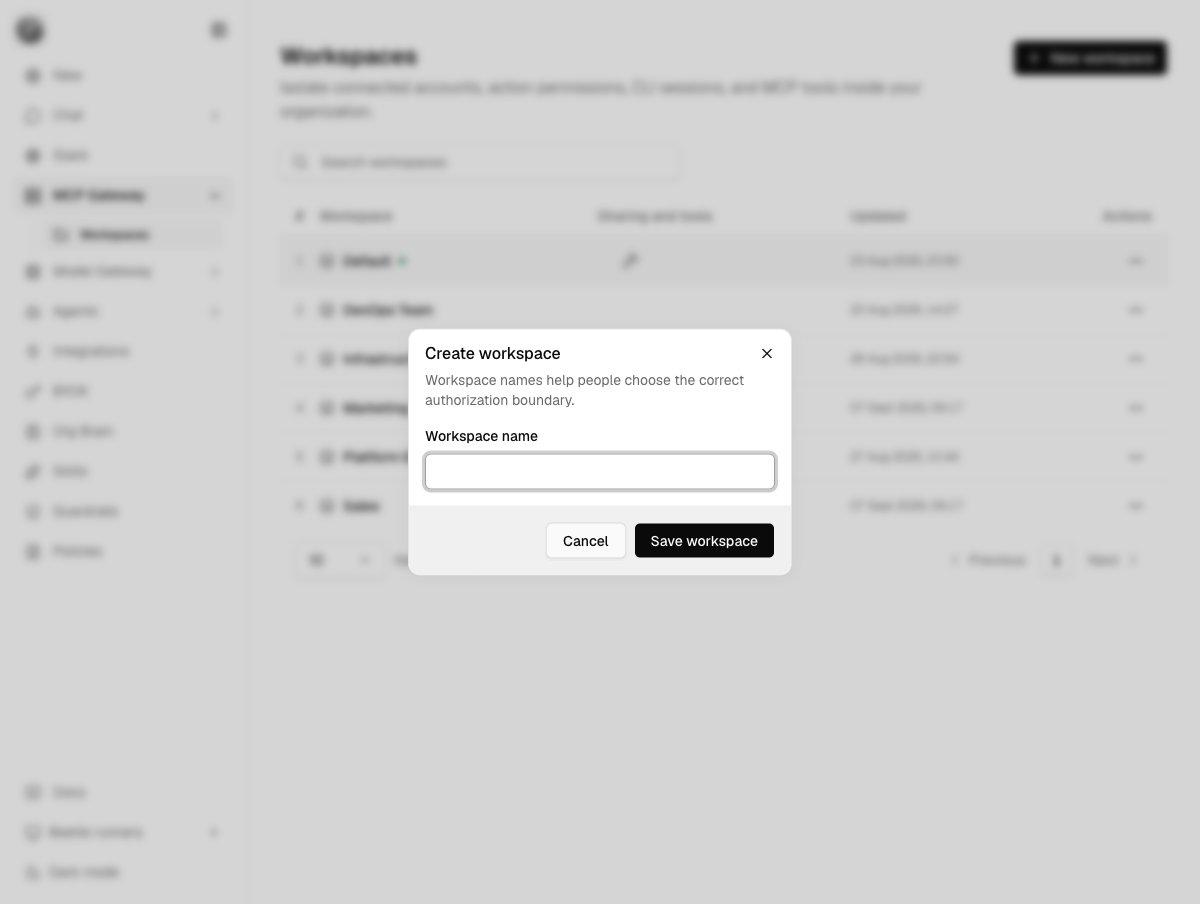
The Create workspace dialog on Organization settings → Workspaces: the line 'Workspace names help people choose the correct authorization boundary.', an empty Workspace name field, and Cancel beside the submit button, which reads Save workspace on this entry point. The list behind the dialog is blurred out.
Workspace names help people choose the correct authorization boundary. The Workspace name field accepts up to 80 characters. An empty name gives Enter a workspace name., and a name whose slug collides with an existing workspace is refused by the server with a workspace with this name already exists. Success toasts {name} workspace created.
The two entry points then diverge:
- From Organization settings → Workspaces the button reads Save workspace, and you stay on the list — creating a workspace deliberately does not move you out of the one you were working in.
- From the MCP Gateway landing page the button reads Create workspace, and Receipt navigates straight into the new workspace’s Overview.
Creating or opening a workspace in the browser does not move your CLI or MCP client into it. A CLI session is bound to the organization’s Default workspace when you sign in; changing it is
receipt workspace use <name>. See Choosing a workspace from the CLI.View details
View details is the first item in every row menu and is never disabled, so someone who cannot manage a workspace can still read its facts — including the ones the table does not carry, such as who created it. It opens a dialog titled with the workspace name and described asHow this authorization boundary was set up and what it currently exposes., with badges for Active, Default and your role, and these rows:
Inside a workspace
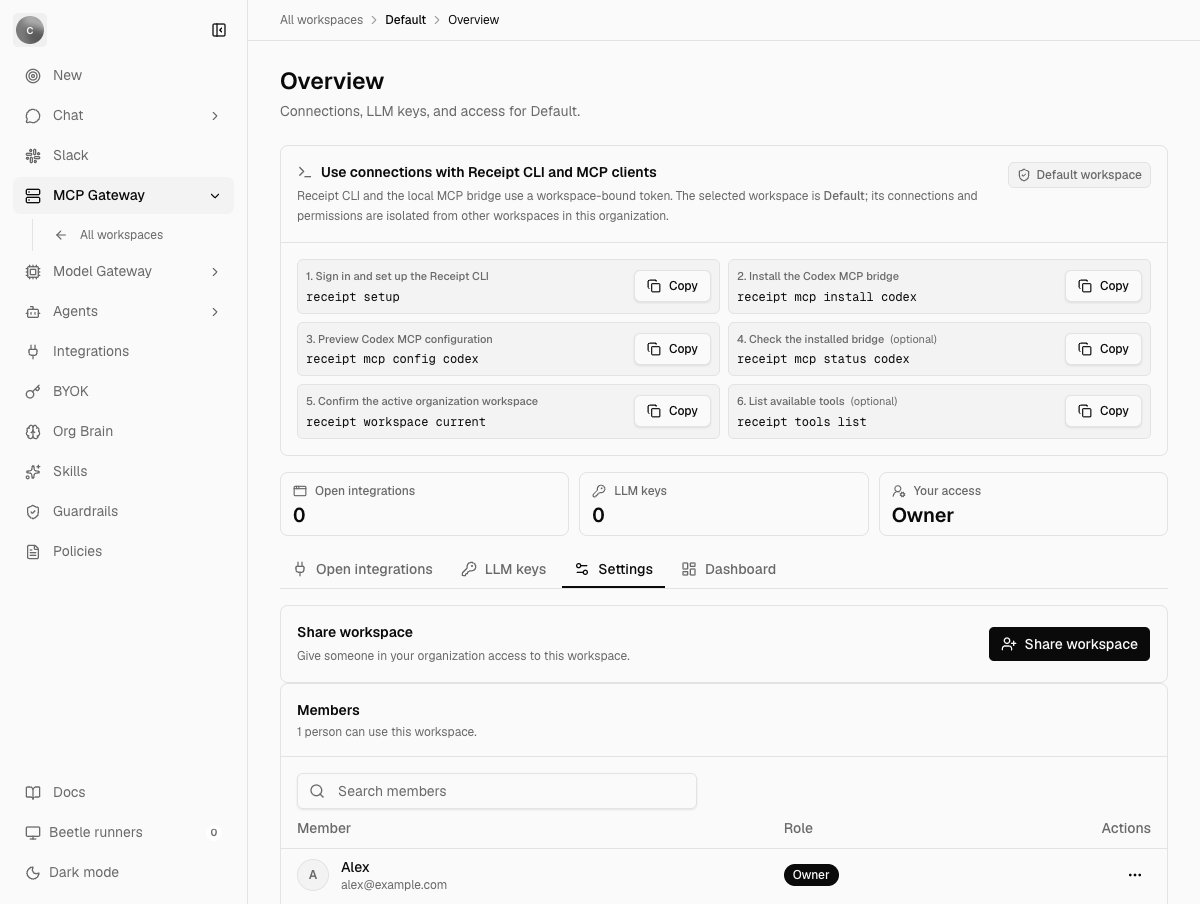
A workspace Overview with the Settings tab open. The setup panel at the top carries the six numbered CLI commands, the three tiles summarise the tab strip below them, and the Settings tab holds Share workspace and the member list.
Connections, LLM keys, and access for <workspace>. Above it, the breadcrumb runs All workspaces, the workspace name, then Overview; every crumb but the last is a link, the workspace one included.
Three tiles summarise the workspace — Open integrations (the number of distinct providers with a valid connection), LLM keys (how many provider keys are configured) and Your access (your effective role) — and each one links to the tab that manages it. The setup panel above them holds the six numbered commands that point a CLI or an MCP client at this workspace; the quickstart walks through them.
The tab strip below the tiles has four entries:
- Open integrations — this workspace’s connections. Connecting an app is covered in Connect an app; deciding which operations it may perform is Tools and permissions.
- LLM keys — the same provider-key form as organization BYOK, bound to this workspace. One card is shown, OpenAI API Key, and a key saved here is stored against this workspace rather than the organization-wide scope. See Bring your own key.
- Settings — sharing and members, below.
- Dashboard — a separate route titled Gateway activity, covered in Gateway activity.
?tab=apps, ?tab=llm-keys and ?tab=settings, so a refresh, the back button and a shared link all land where you expect.
Share a workspace
On the Settings tab, owners and admins get a Share workspace section —Give someone in your organization access to this workspace. — with a button of the same name.
The dialog is titled Share workspace / Send an invitation to your workspace. You enter an Email address, placeholder teammate@company.com, add up to five addresses with Add another, and press Send invitation. Done closes it.
Two invitation paths run behind that one button, and you do not choose between them: someone who is already in your organization gets a workspace-only invitation, while a new person gets an organization invitation that carries the workspace with it. Either way, access is granted on acceptance. An address that already has access is reported per row as {email}: already has access to this workspace.
When the deployment cannot send mail, the dialog does not pretend otherwise. It shows the invitation link and says why:
No invitation email was sent — this instance has no mail transport configured. Copy and send this invitation link to the invited person.The copy button toasts
Invitation link copied. Sent mail toasts Invitation email sent. Workspace access is granted after acceptance.; a link-only invitation toasts Invitation created. Copy the link below.
Members and pending invitations
The Members section counts itself —1 person can use this workspace. or {n} people can use this workspace. — offers a Search members box, and lists Member, Role and Actions. Only people who actually have access appear; the rest of the organization is not shown as rows waiting to be switched on.
An invitation that has not been accepted takes the place of the role badge with a Pending badge, and its row menu offers Cancel invitation, which works for both invitation paths and toasts Invitation to {email} cancelled. Everyone else gets Remove from workspace, which toasts {email} no longer has access. and is disabled in two cases, each with its reason on the item:
- on yourself —
You cannot remove your own access. - in the Default workspace —
Default membership follows the organization.
Listing members requires workspace owner or admin authority (an organization owner or admin qualifies everywhere). A plain workspace member who opens the Settings tab sees
Nobody has been given access yet. rather than an error — the refusal is not surfaced.Rename and delete
Rename opens a Rename workspace dialog with the same 80-character name field and toastsWorkspace renamed. on success.
Deleting a workspace revokes the credentials every agent using it depends on, so it takes two steps and the second one asks you to type a word.
1
Delete workspace
The first dialog reads
Delete {name}? This cannot be undone. Agents using this workspace will no longer be able to use its credentials. Connections in other workspaces are not affected. The button is Continue to delete.2
Type the word Delete
The second is titled
Confirm you are deleting {name} and reads This is permanent. Type Delete below to delete {name} and revoke its credentials for every agent using it. The field is labelled Type Delete to confirm and the Delete button stays disabled until the trimmed input is exactly Delete — the comparison keeps case, because transcribing the word is the point. Anything else gives Type Delete exactly to confirm this deletion. Back returns you to the first step.{name} workspace deleted. Two deletions the server refuses outright, both with HTTP 409:
- The Default workspace:
the Default workspace cannot be deleted. Its menu item is visible but disabled, with the tooltipThe Default workspace cannot be deleted. - Any workspace that still has connections:
workspace connections must be removed before deleting the workspace. Disconnect them from the Open integrations tab first.
Who can do what
Workspace access does not follow the same rule as the rest of organization settings.- Any organization member can open the Workspaces page and the MCP Gateway. The settings-access rule makes an explicit exception for both paths. The list itself still only returns workspaces you are a member of.
- Creating, renaming and deleting a workspace from the web app requires an organization owner or admin. Two checks run and both are on the server, not in the browser: the web app’s own action refuses first with
Only organization owners and admins can manage workspaces., and the runtime refuses again independently — creating without that role answersorganization owner or admin permission is required. In the row menu, Rename, Share and Delete are disabled when your effective role in that workspace is neither owner nor admin; New workspace is always offered, and the refusal arrives as the dialog’s error. - Sharing and member management require workspace owner or admin authority, which an organization owner or admin has in every workspace regardless of what that workspace’s own member row says. The role you see in the interface is your organization role when that is owner or admin, and your workspace role otherwise.
owner, admin and member. How people join the organization in the first place is Members and roles.
Next step: see which surface reads which workspace.