> ## Documentation Index
> Fetch the complete documentation index at: https://docs.kentron.ai/llms.txt
> Use this file to discover all available pages before exploring further.
# Create and manage your account
> Sign up for Receipt, verify your email, sign back in, and manage your profile, password and sessions afterwards.
Everything below happens at `app.kentron.ai`. Sign-up is self-service on the hosted app — no invitation is required to create your own account, and opening the root URL takes you straight to the sign-up form rather than a landing page.
**You cannot turn two-factor authentication on from inside the product in this release.** Sign-in verifies a code from your authenticator app for accounts that already have it enrolled, but no screen exists to enrol one. Extra sign-in providers are the same: the Security page shows a single **Email & password** row and can unlink it, but offers no action to add another.
## Signing up
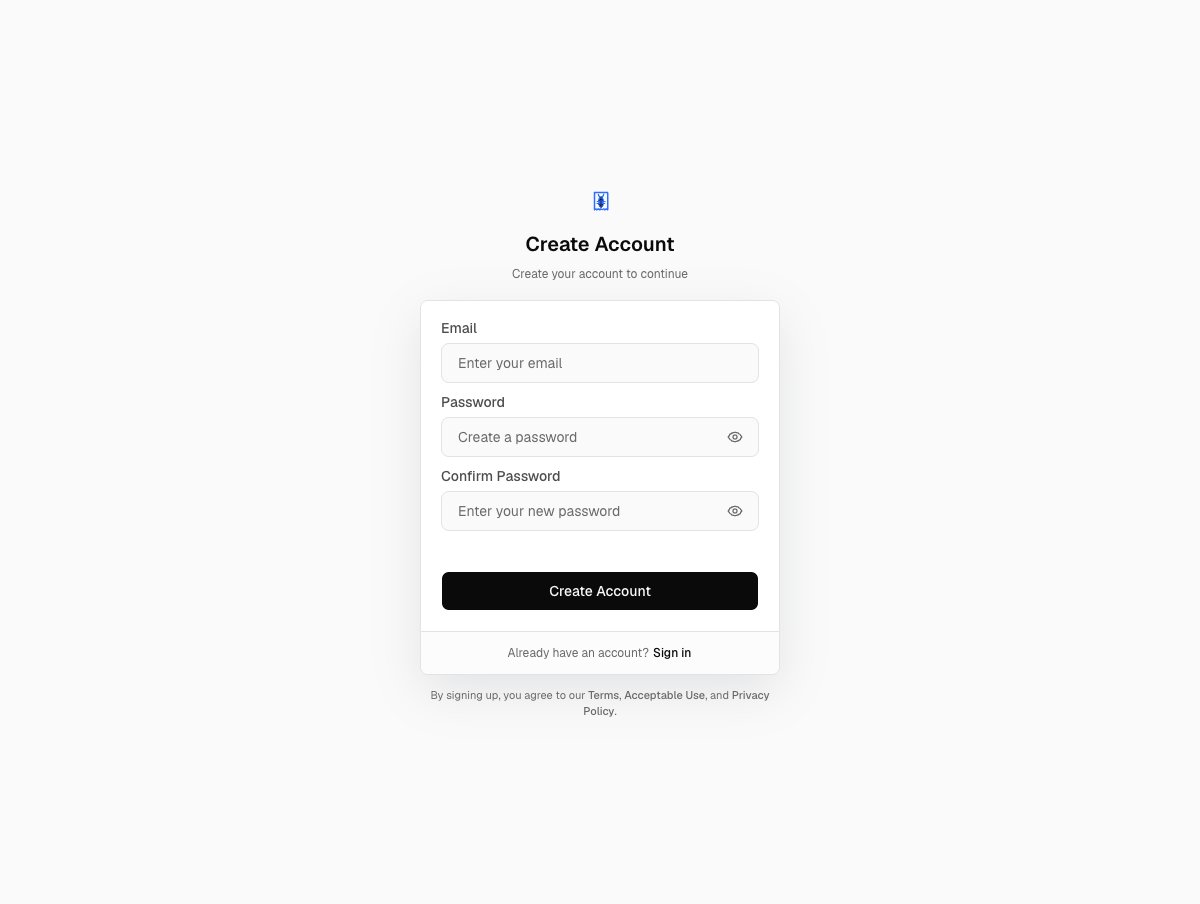 Enter your email, a password, and confirm it. Your password must be between 8 and 128 characters. Depending on what is wrong you will see `Please enter a valid email address`, `Password must be at least 8 characters`, or `Passwords do not match`.
Receipt emails you a six-digit code and shows the **Check Your Email** step with a live `Expires in {time}` countdown. The code is valid for five minutes and you get five attempts. Run out and you will see `You entered too many incorrect codes. Request a new one to continue.` A wrong or stale code shows whatever the auth service reports — `Invalid OTP` or `OTP expired` — and `That code is invalid or expired. Request a new one and try again.` is the fallback for a failure that carries no message.
As soon as your account exists, Receipt creates an organization, writes its billing baseline, and grants you a one-time platform credit of \$5.00.
You are redirected straight to the chat page. There is no onboarding wizard to click through first.
### What gets created with you
The new organization is named after you: `'s Workspace`. Because the sign-up form has no name field, your account starts with an empty name, and Receipt falls back to the local part of your email address for the organization name — dots, underscores and hyphens become spaces, and every word is capitalised. Someone signing up as `ari.say@example.com` lands in **Ari Say's Workspace**. Setting a display name later on the Account page does not rename the organization.
The \$5.00 credit is granted once per user, not once per organization. A unique index on the credit ledger guards it, so it does not repeat if you later create a second organization or are added to someone else's. See [organizations and workspaces](/core/organizations-and-workspaces) for what that organization contains and [billing and plans](/core/billing-and-plans) for how the credit is spent.
If you arrived from an invitation link instead, the sign-up form pre-fills the invited address and tells you `This invitation is tied to this email address.` — you must use that address to join. [Members and roles](/core/members-and-roles) covers invitations from the other side.
## Signing back in
The sign-in page greets you with **Welcome Back** / **Sign in to continue**. Bad credentials return `Invalid email or password`.
Enter your email, a password, and confirm it. Your password must be between 8 and 128 characters. Depending on what is wrong you will see `Please enter a valid email address`, `Password must be at least 8 characters`, or `Passwords do not match`.
Receipt emails you a six-digit code and shows the **Check Your Email** step with a live `Expires in {time}` countdown. The code is valid for five minutes and you get five attempts. Run out and you will see `You entered too many incorrect codes. Request a new one to continue.` A wrong or stale code shows whatever the auth service reports — `Invalid OTP` or `OTP expired` — and `That code is invalid or expired. Request a new one and try again.` is the fallback for a failure that carries no message.
As soon as your account exists, Receipt creates an organization, writes its billing baseline, and grants you a one-time platform credit of \$5.00.
You are redirected straight to the chat page. There is no onboarding wizard to click through first.
### What gets created with you
The new organization is named after you: `'s Workspace`. Because the sign-up form has no name field, your account starts with an empty name, and Receipt falls back to the local part of your email address for the organization name — dots, underscores and hyphens become spaces, and every word is capitalised. Someone signing up as `ari.say@example.com` lands in **Ari Say's Workspace**. Setting a display name later on the Account page does not rename the organization.
The \$5.00 credit is granted once per user, not once per organization. A unique index on the credit ledger guards it, so it does not repeat if you later create a second organization or are added to someone else's. See [organizations and workspaces](/core/organizations-and-workspaces) for what that organization contains and [billing and plans](/core/billing-and-plans) for how the credit is spent.
If you arrived from an invitation link instead, the sign-up form pre-fills the invited address and tells you `This invitation is tied to this email address.` — you must use that address to join. [Members and roles](/core/members-and-roles) covers invitations from the other side.
## Signing back in
The sign-in page greets you with **Welcome Back** / **Sign in to continue**. Bad credentials return `Invalid email or password`.
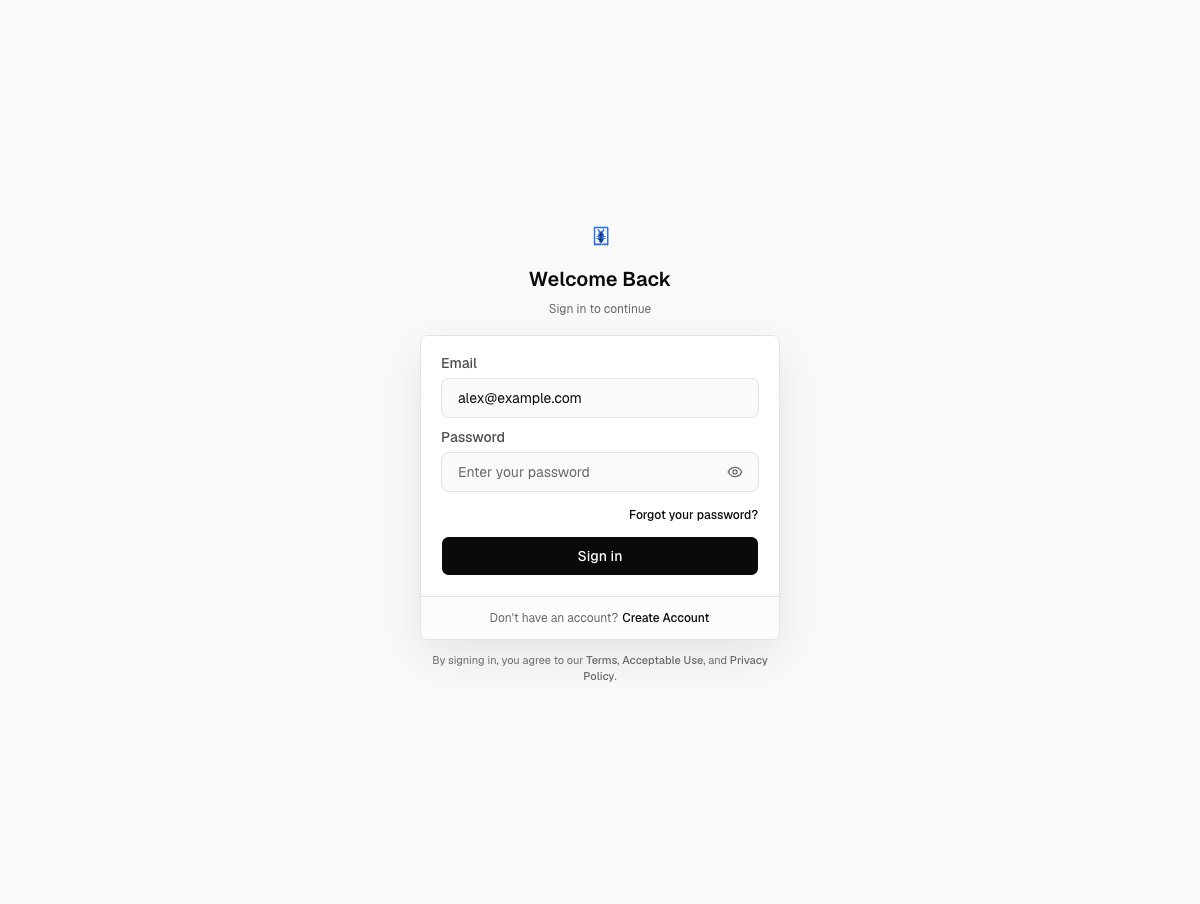 **Forgot your password?** starts an emailed code, not a reset link. Notice that the reset step asks only for your email, and that **Send Code** stays disabled until you type one.
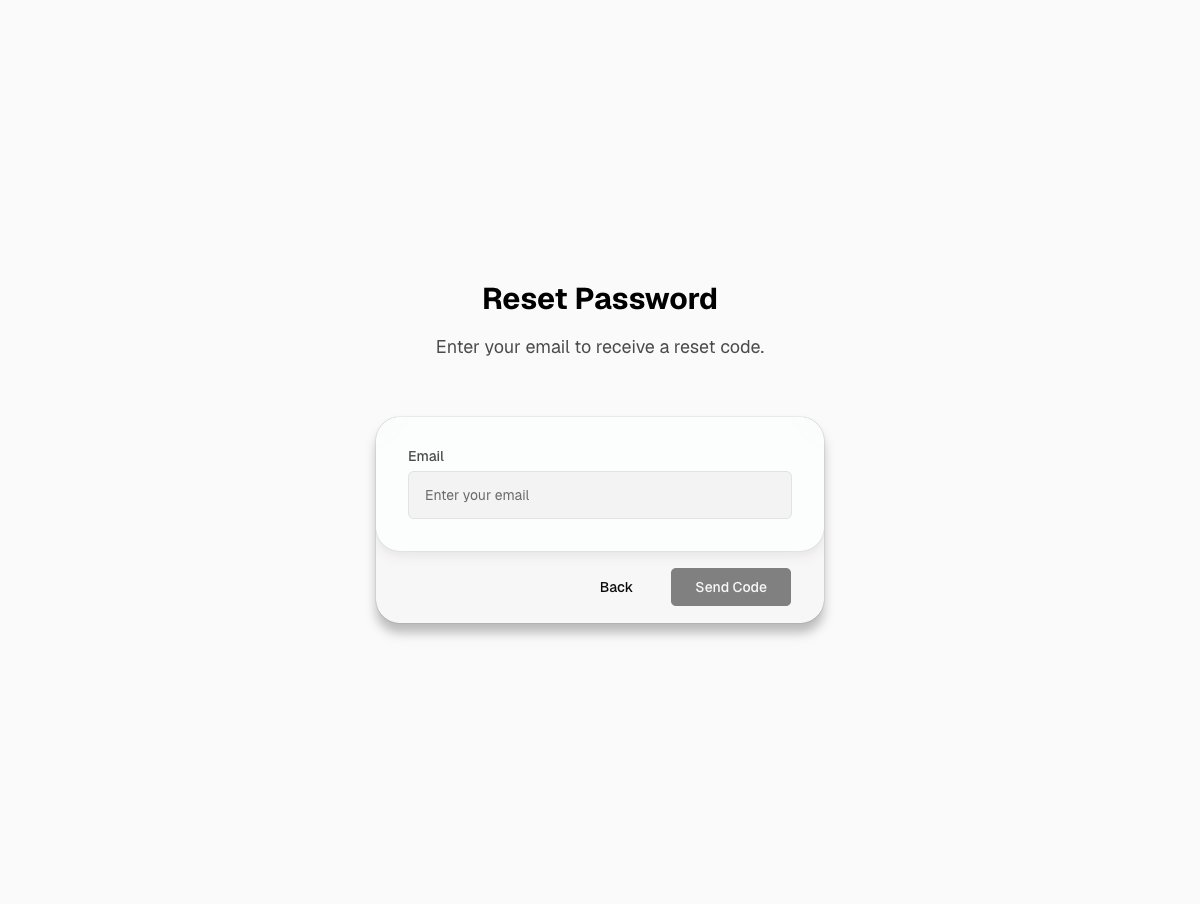 From there you enter the six-digit code on a **Check Your Email** step — `Enter the code sent to {email}.` — and then set the new one on **Create Your New Password**, confirmed with **Update Password**. A code that is not exactly six digits sends you back a step with `Enter the 6-digit code we sent you by email.` Resetting your password also revokes every existing session on your account.
If your account already has two-factor authentication enrolled, sign-in inserts a **Two-step verification** step: `Before continuing, enter the code from your authenticator app.`
## Account settings
Your account page is at `/settings`, reached from the organization avatar in the sidebar. Unlike the organization settings pages, it is open to every signed-in user regardless of role.
From there you enter the six-digit code on a **Check Your Email** step — `Enter the code sent to {email}.` — and then set the new one on **Create Your New Password**, confirmed with **Update Password**. A code that is not exactly six digits sends you back a step with `Enter the 6-digit code we sent you by email.` Resetting your password also revokes every existing session on your account.
If your account already has two-factor authentication enrolled, sign-in inserts a **Two-step verification** step: `Before continuing, enter the code from your authenticator app.`
## Account settings
Your account page is at `/settings`, reached from the organization avatar in the sidebar. Unlike the organization settings pages, it is open to every signed-in user regardless of role.
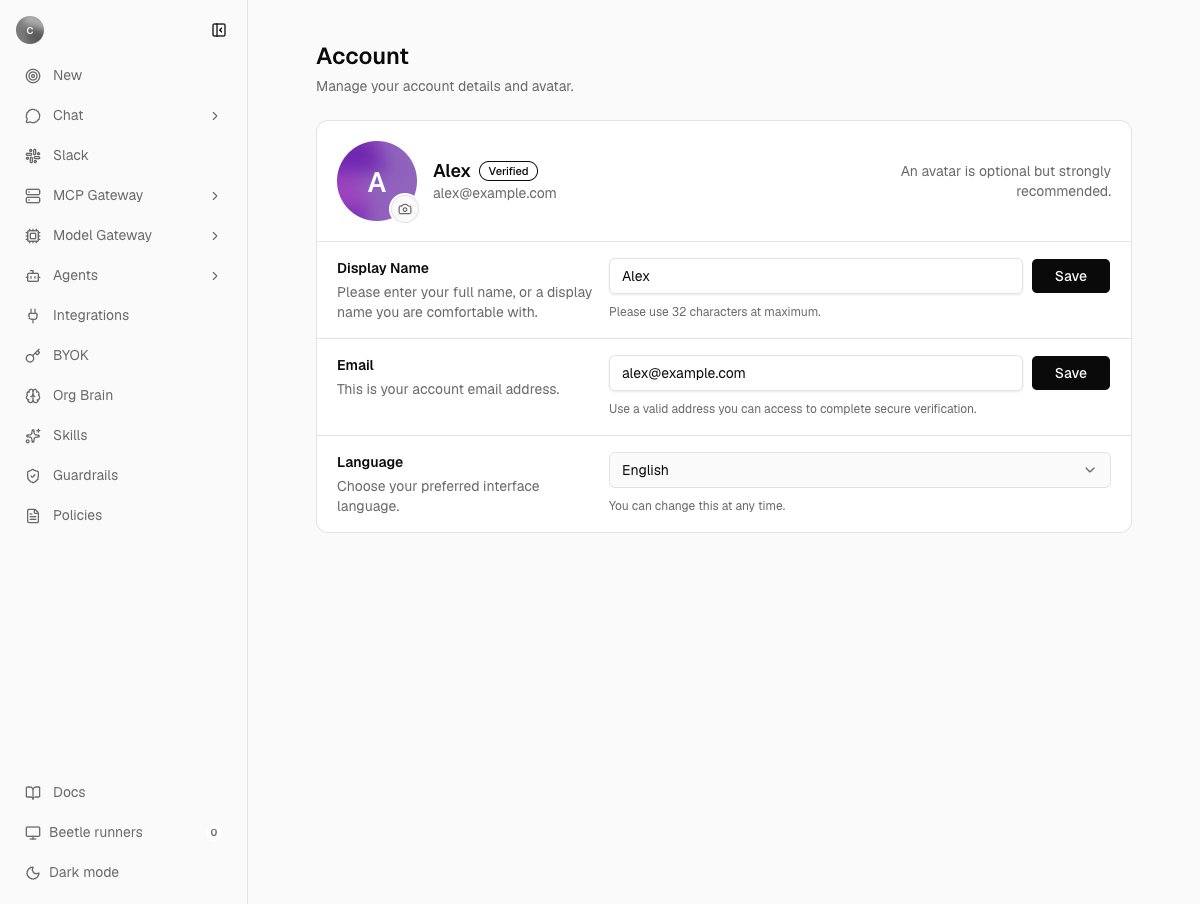 | Setting | What it accepts |
| ---------------- | ----------------------------------------------------------------------------------------------------------------------------------------------------------------------------------------- |
| **Avatar** | JPG, PNG, WEBP or SVG, up to 10 MB. A larger file is rejected with `File exceeds limit of 10MB.` and a wrong format with `Please upload a JPG, PNG, WEBP, or SVG image.` |
| **Display Name** | Up to 32 characters — `Please use 32 characters at maximum.` Saving confirms with `Display name saved.` |
| **Email** | Your account address, badged `Verified` or `Unverified`. Changing it does not take effect immediately: you get `Email change request submitted. Check your inbox to finish verification.` |
| **Language** | Your preferred interface language. It is the one row with no **Save** button — the choice applies as soon as you pick it. |
Each field saves on its own, so there is no page-level save. The menu you opened **Account** from also carries the **Sign out** entry.
## Security
The Security page is at `/settings/security`.
| Setting | What it accepts |
| ---------------- | ----------------------------------------------------------------------------------------------------------------------------------------------------------------------------------------- |
| **Avatar** | JPG, PNG, WEBP or SVG, up to 10 MB. A larger file is rejected with `File exceeds limit of 10MB.` and a wrong format with `Please upload a JPG, PNG, WEBP, or SVG image.` |
| **Display Name** | Up to 32 characters — `Please use 32 characters at maximum.` Saving confirms with `Display name saved.` |
| **Email** | Your account address, badged `Verified` or `Unverified`. Changing it does not take effect immediately: you get `Email change request submitted. Check your inbox to finish verification.` |
| **Language** | Your preferred interface language. It is the one row with no **Save** button — the choice applies as soon as you pick it. |
Each field saves on its own, so there is no page-level save. The menu you opened **Account** from also carries the **Sign out** entry.
## Security
The Security page is at `/settings/security`.
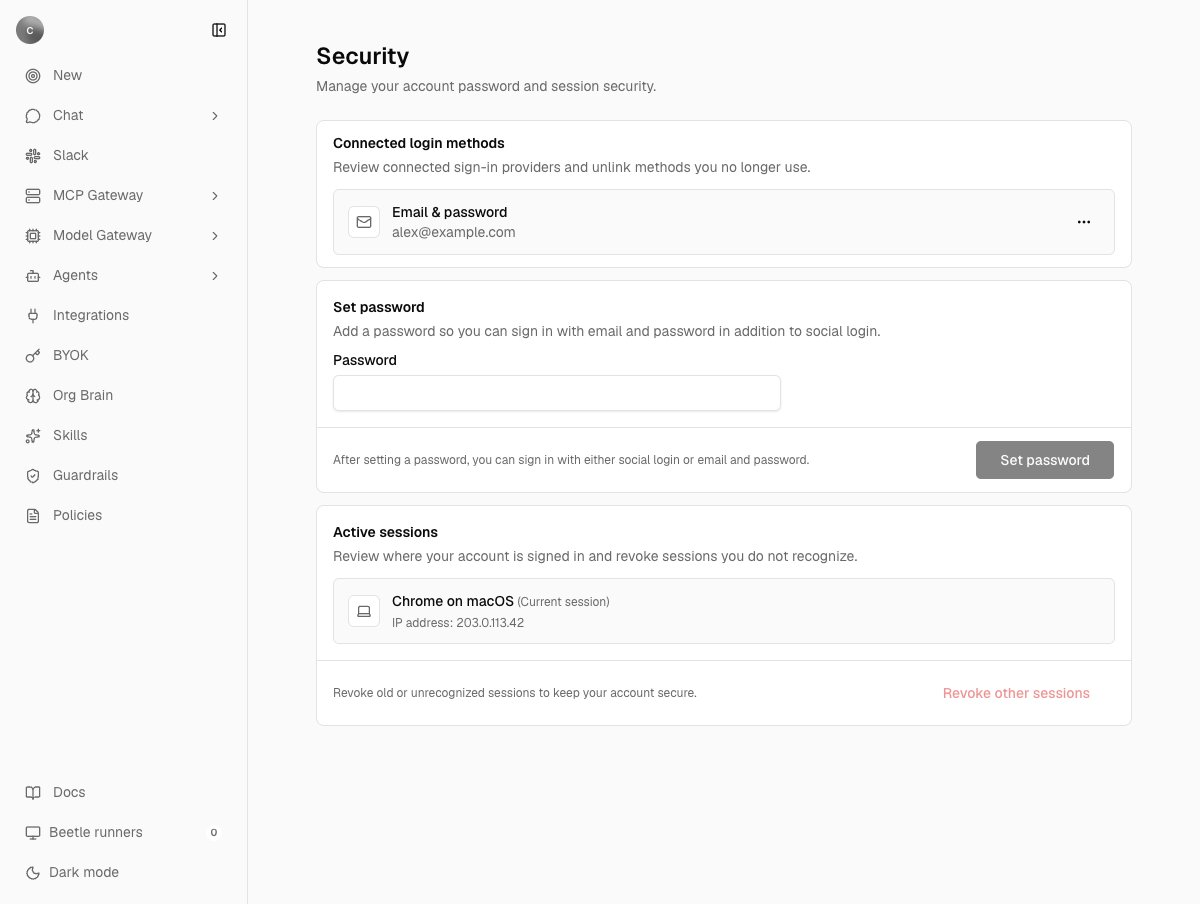 **Connected login methods** shows one row, **Email & password**, with your account address. Its menu offers **Unlink** only when a second method is connected; otherwise it holds a disabled **Manage** entry, and unlinking your only method is refused with `You must keep at least one login method connected.`
**Change password** asks for your current password and a new one, and warns you plainly: `You will be signed out from other sessions after changing your password.` If your account has no password yet, the same panel appears as **Set password** and skips the current-password field.
**Active sessions** shows each signed-in device with its IP address and marks the one you are using as the current session. Revoke them one at a time, or use **Revoke other sessions** to clear the rest at once. With nothing else to clear you get `No other active sessions to revoke.`
Sessions last seven days and refresh on a one-day sliding window each time you use one. A single browser keeps at most ten of them side by side.
## On a self-hosted instance
Identity works differently when you run Receipt yourself. The first account is the admin account you create in the setup wizard — `Create your admin account`, `Finish setup by creating the first admin account.` — after claiming the instance with its setup token, and a fresh instance then defaults to invite-only signups.
Several of the flows above are switched off at the auth layer on a self-hosted instance: email delivery for verification and password recovery is refused with `Email verification and password recovery are disabled for self-hosted instances.`, social sign-in with `Social auth is disabled for self-hosted instances.`, changing your email address is turned off entirely, and `/auth/sign-up` redirects to the sign-in page once setup is complete. Plan on managing passwords out of band, because there is no in-product recovery path. The platform signup credit is not granted either — it exists only on the hosted app. [Self-hosting](/core/self-hosting) covers the wizard and the signup policy that goes with it.
Next step: [see how organizations and workspaces divide your data](/core/organizations-and-workspaces).
**Connected login methods** shows one row, **Email & password**, with your account address. Its menu offers **Unlink** only when a second method is connected; otherwise it holds a disabled **Manage** entry, and unlinking your only method is refused with `You must keep at least one login method connected.`
**Change password** asks for your current password and a new one, and warns you plainly: `You will be signed out from other sessions after changing your password.` If your account has no password yet, the same panel appears as **Set password** and skips the current-password field.
**Active sessions** shows each signed-in device with its IP address and marks the one you are using as the current session. Revoke them one at a time, or use **Revoke other sessions** to clear the rest at once. With nothing else to clear you get `No other active sessions to revoke.`
Sessions last seven days and refresh on a one-day sliding window each time you use one. A single browser keeps at most ten of them side by side.
## On a self-hosted instance
Identity works differently when you run Receipt yourself. The first account is the admin account you create in the setup wizard — `Create your admin account`, `Finish setup by creating the first admin account.` — after claiming the instance with its setup token, and a fresh instance then defaults to invite-only signups.
Several of the flows above are switched off at the auth layer on a self-hosted instance: email delivery for verification and password recovery is refused with `Email verification and password recovery are disabled for self-hosted instances.`, social sign-in with `Social auth is disabled for self-hosted instances.`, changing your email address is turned off entirely, and `/auth/sign-up` redirects to the sign-in page once setup is complete. Plan on managing passwords out of band, because there is no in-product recovery path. The platform signup credit is not granted either — it exists only on the hosted app. [Self-hosting](/core/self-hosting) covers the wizard and the signup policy that goes with it.
Next step: [see how organizations and workspaces divide your data](/core/organizations-and-workspaces).